How to configure a remote computer with Windows Vista, 7, 8, 10, 11, 2008, 2012, 2016, 2019 for accessing via Remote Computer Manager
Before working with the program "Remote Computer Manager", the remote computer must be pre-configured.
Log in to the remote computer using the administrator account and do the following steps:
Step 1. Allow "file and printer sharing" and "network discovery".
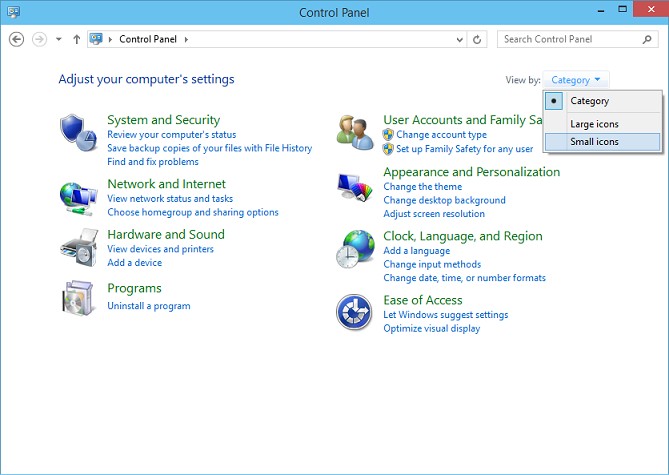
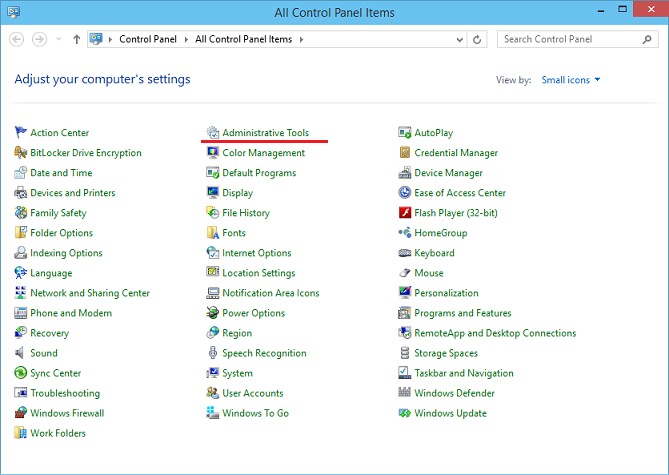
Open the control panel and switch the view to small icons.
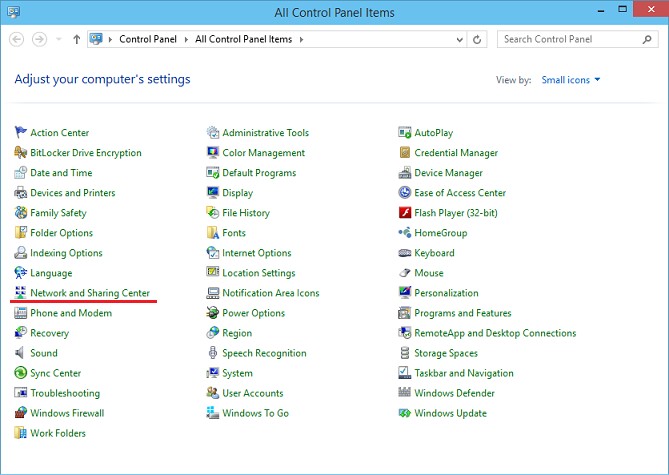
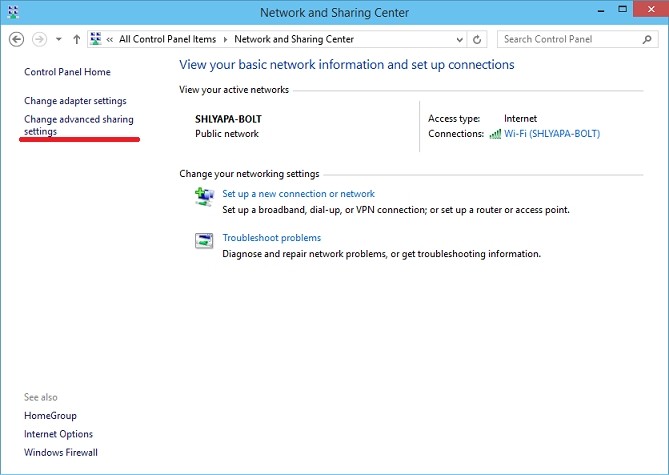
Open "Network and Sharing Center" and click on "Change advanced sharing settings".
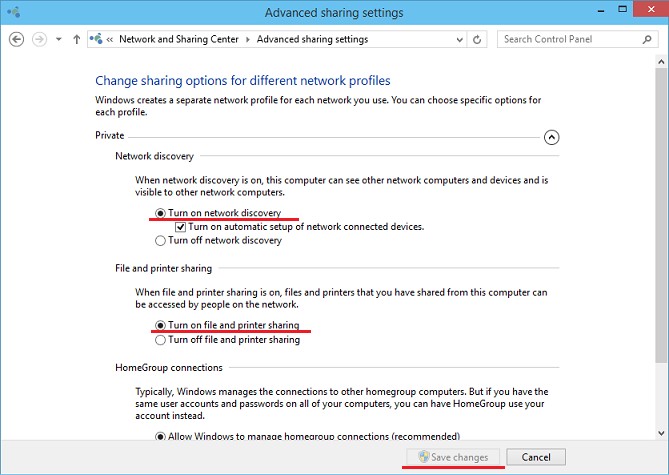
Expand the parameters of the current profile and click on "Turn on network discovery" and "Turn on file and printer sharing".
After that, click on "Save changes".
Step 2. Disable UAC filtering for remote administrator's. (You can skip this step if the remote computer is connected to a domain and you know the domain administrator account)
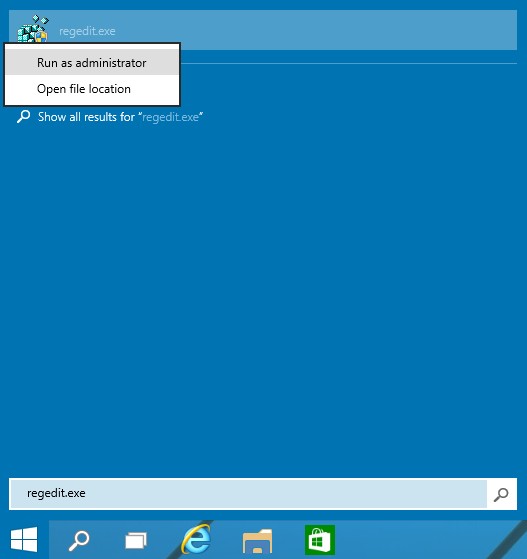
Click on "Start" and type "regedit.exe" in the search bar. After that, make a right-click on regedit.exe and click on "run as administrator".
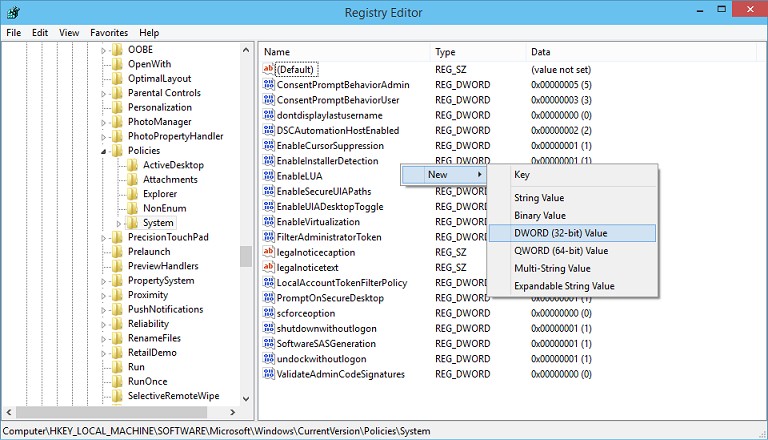
In Registry Editor, navigate to the sub-key "HKEY_LOCAL_MACHINE\SOFTWARE\Microsoft\Windows\CurrentVersion\Policies\System".
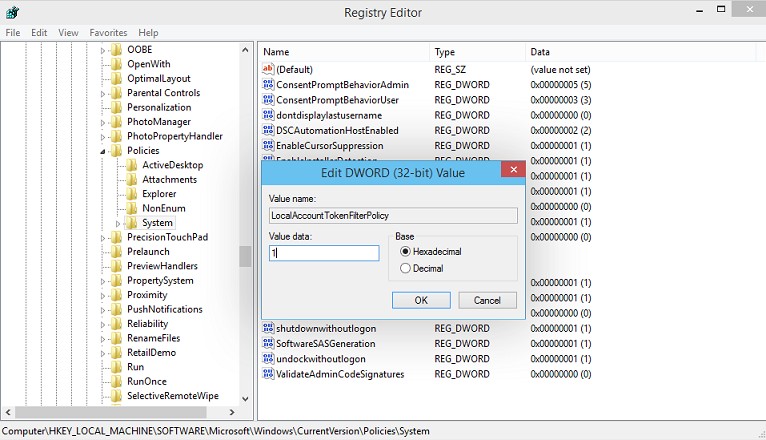
Make a right-click on an empty space. In the pop-up menu, create a new DWORD Value. After that, rename new value to LocalAccountTokenFilterPolicy and set value data into 1.
Step 3. Create administrator account with a password. (You can skip this step if the remote computer is connected to a domain and you know the domain administrator account)
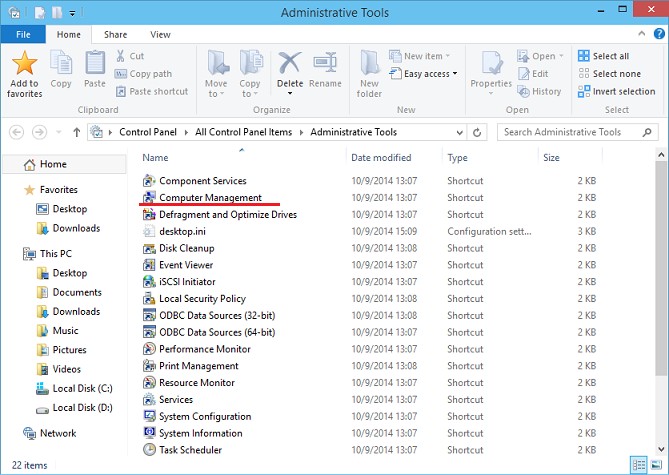
Open the control panel and switch the view to small icons. Click on "Administrative Tools" and open "Computer Management".
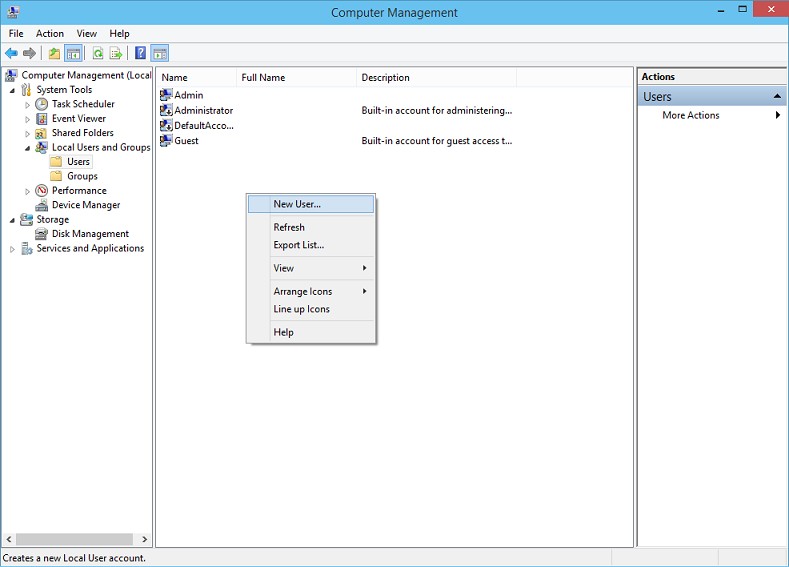
In the Management Console, navigate to the item "Computer Management\System Tools\Local Users and Groups\Users".
Make a right-click on an empty space. In the pop-up menu, click on "New User".
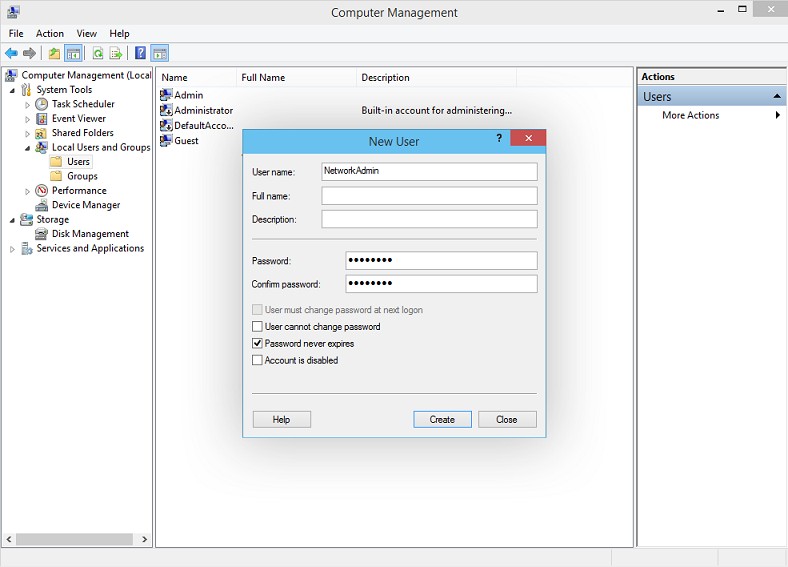
In the pop-up window, enter the user name and password (remember this name and password, it will be used in the program).
Uncheck all boxes and check the box "Password never expires". After that, click on "Create" button.
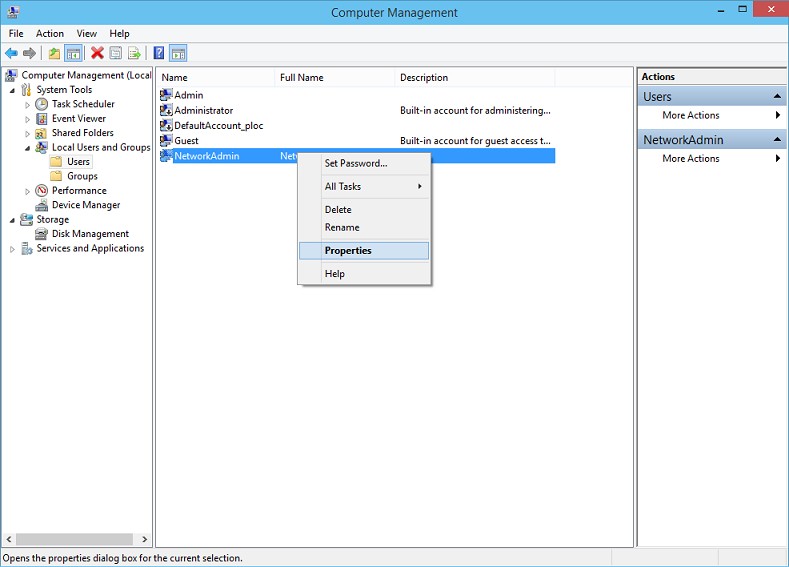
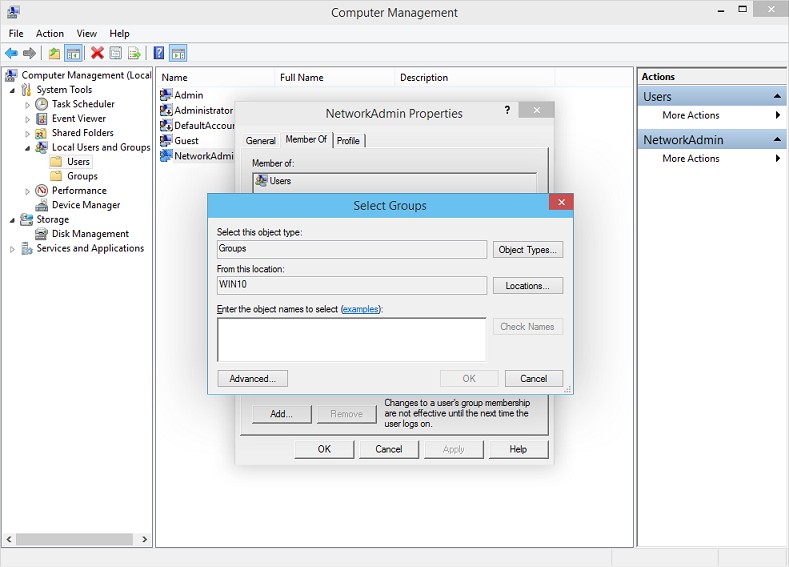
Make a right-click on a new user. In the pop-up menu, click on "Properties".
In the pop-up window, go to the tab "Member Of" and click on "Add" button. In the new pop-up window, click on "Advanced" button.
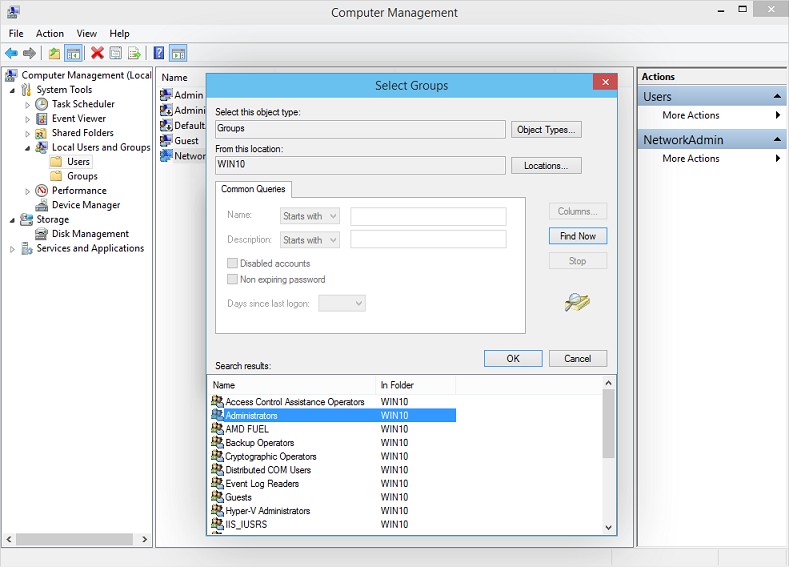
In the pop-up window, click on "Find Now" button. In the search results, locate and select the "Administrators" group.
After that, click on "OK" button in all pop-up windows.
You need to use this username and password when you will add this computer to the database of Remote Computer Manager.
Click the link below for learning how to add this computer to the database of Remote Computer Manager.
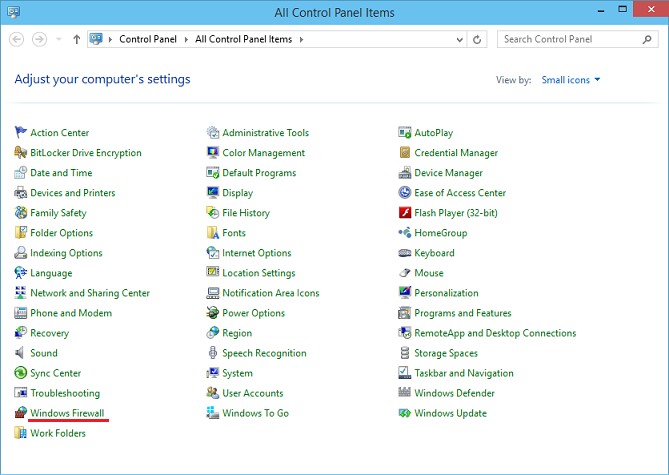
Step 4. Check the firewall settings. (Skip this step if you do not have problems)
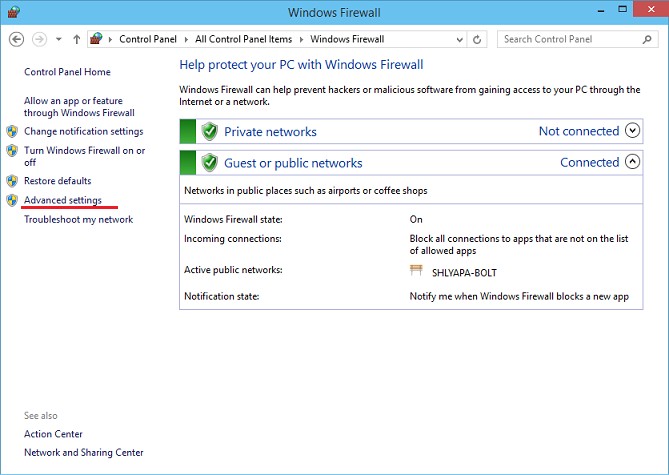
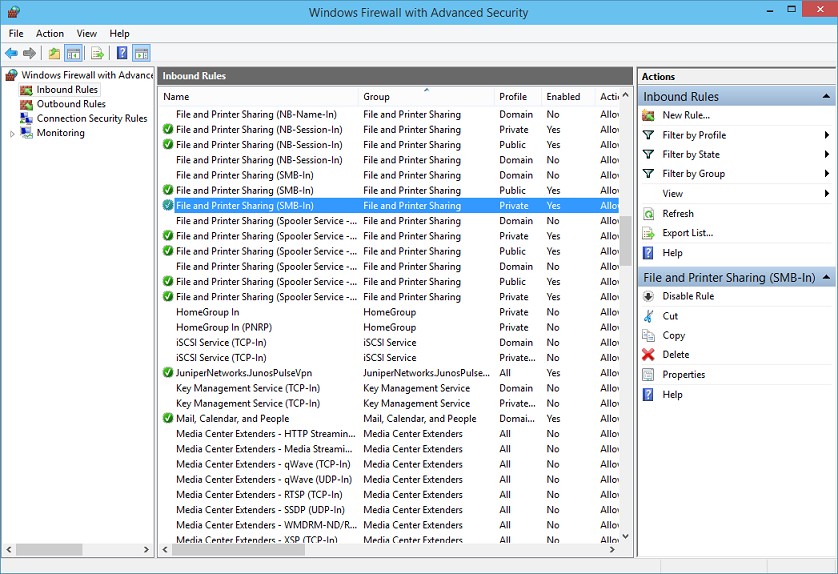
Open the control panel and switch the view to small icons. Open "Windows Firewall" and click on "Advanced settings".
In the new window, make a click on "Inbound Rules". Be sure that the following rules are enabled and allow connections:
File and Printer Sharing (Smb-In),
File and Printer Sharing (Echo Request - ICMPv4-In),
File and Printer Sharing (Echo Request - ICMPv6-In),
File and Printer Sharing (LLMNR-UDP-In),
File and Printer Sharing (NB-Name-In)
Make a click on "Outbound Rules". Be sure that the following rules are enabled and allow connections:
File and Printer Sharing (Echo Request - ICMPv4-Out),
File and Printer Sharing (Echo Request - ICMPv6-Out),
File and Printer Sharing (LLMNR-UDP-Out), File and Printer Sharing (NB-Name-Out)
If you use a third-party firewall, be sure that he allows the following actions:
Incoming TCP connections to port 445 (Server Message Block (SMB) protocol),
ICMP requests and responses,
Incoming and outgoing UDP packets to port 137 (NetBIOS Name Resolution protocol).
Incoming and outgoing UDP packets to port 5355 (Link Local Multicast Name Resolution protocol).
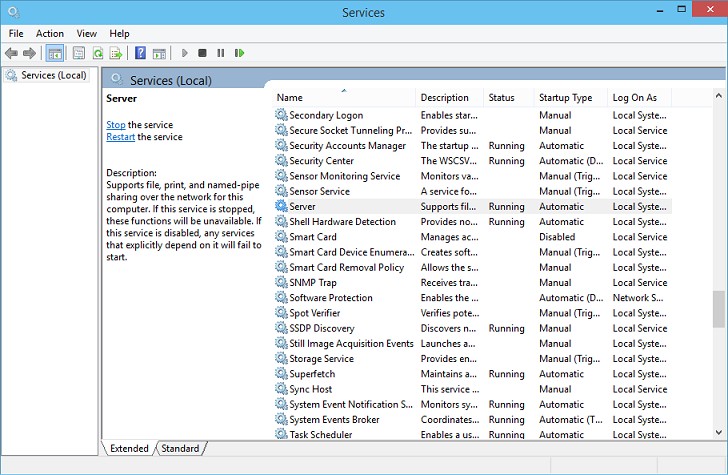
Step 5. Check running services. (Skip this step if you do not have problems)
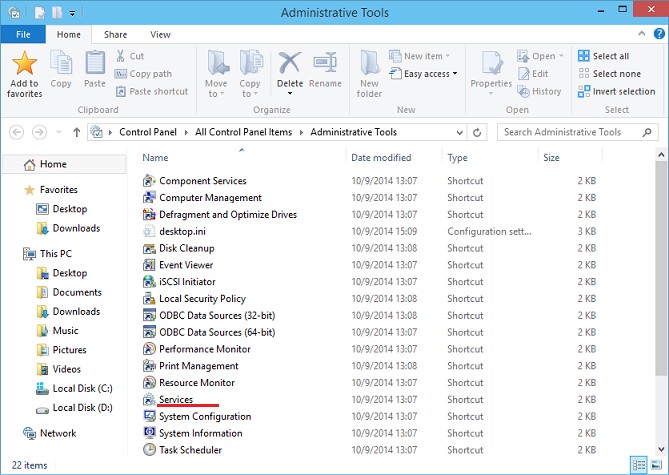
Open the control panel and switch the view to small icons. Click on "Administrative Tools" and open "Services".
Step 6. Check network components. (Skip this step if you do not have problems)
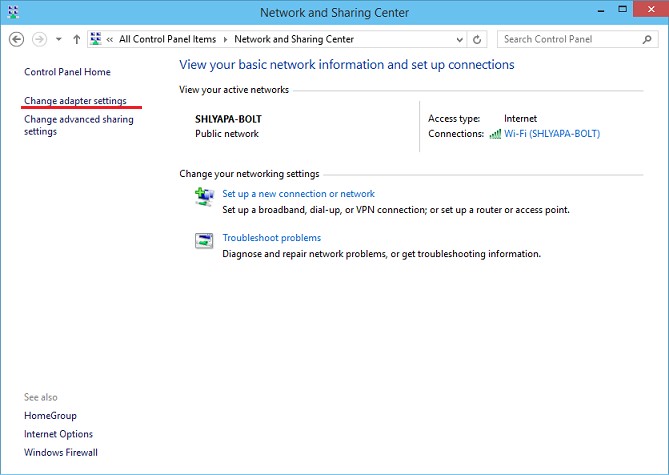
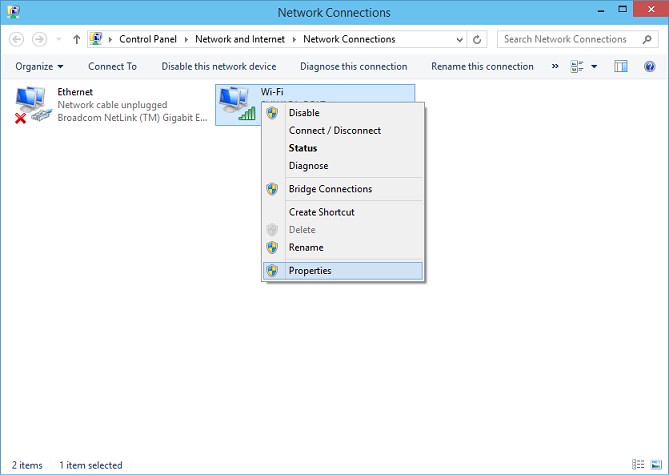
Open the control panel and switch the view to small icons. Open "Network and Sharing Center" and click on "Change adapter settings".
In the new window, make a right-click on a current network adapter. In the pop-up menu, click on "Properties".
Be sure that the following components are installed and enabled:
Client for Microsoft Networks, File and Printer Sharing for Microsoft Networks.
Step 7. Verify that the administrative shares are active. (Skip this step if you do not have problems)
Click on "Start" and type "regedit.exe" in the search bar. After that, make a right-click on regedit.exe and click on "run as administrator".
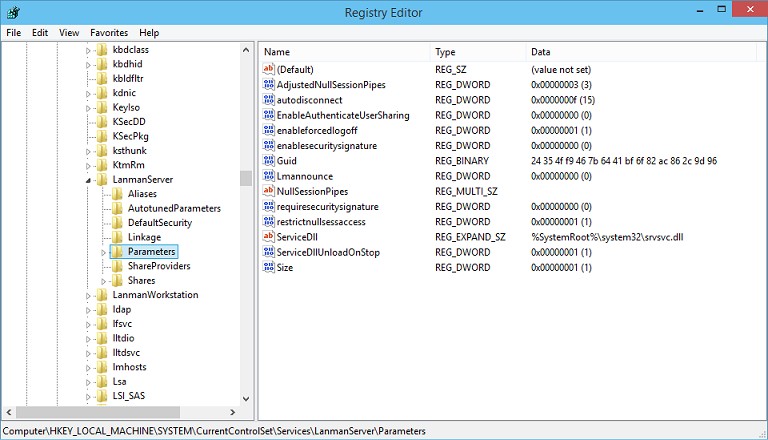
In Registry Editor, navigate to the sub-key "HKEY_LOCAL_MACHINE\System\CurrentControlSet\Services\LanmanServer\Parameters".
If the AutoShareServer and AutoShareWks DWORD values are configured with a value data of 0, change that value to 1.
If these values do not exist, you do not have to create them.
Step 8. Restart the computer.
Some changes require that you restart your computer.